Main Window Overview
The main window is where you build and configure your network. The toolbar at the top holds the primary actions, the configuration tabs in the centre hold the hyperparameters, and the tree on the right holds the network's inputs, outputs, code and ticker pool.
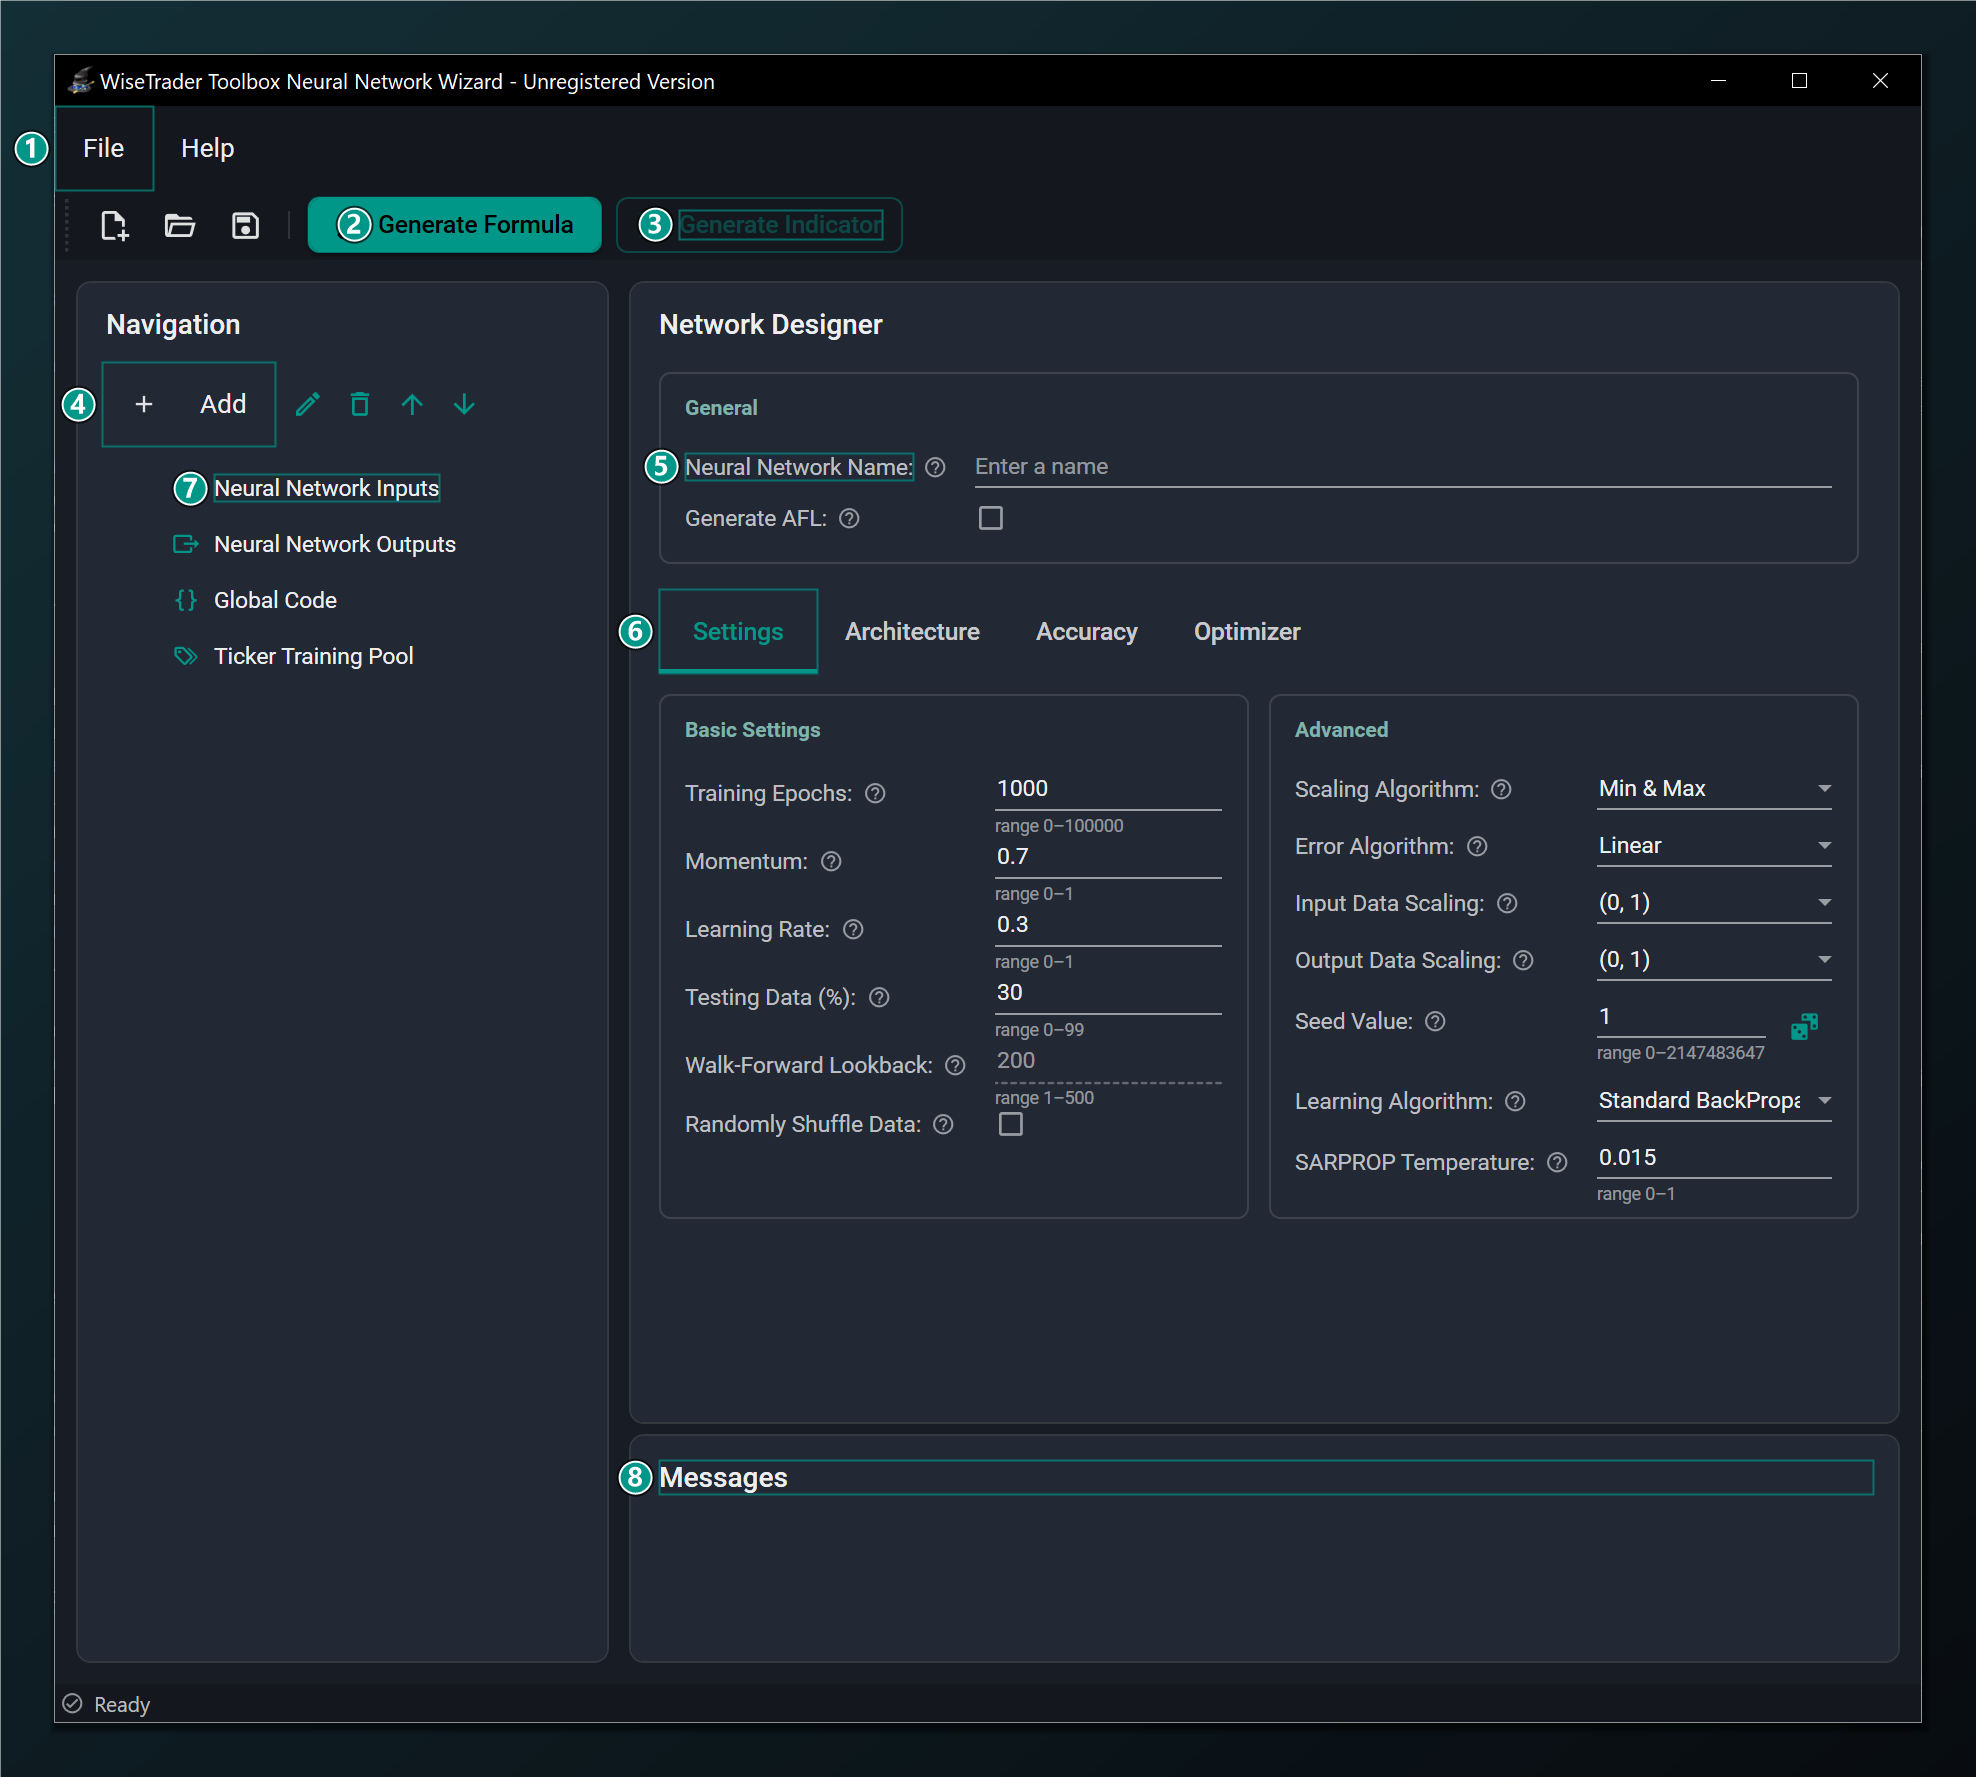
- Menu bar — File (New/Open/Save/Exit) and Help (Register/About). See Menus & Toolbar.
- Generate Formula — validate the network and generate the AmiBroker training AFL. The primary action.
- Generate Indicator — build the chart indicator from a trained, compiled network (MLP only). It greys out, with a tooltip reason, whenever the network can't be a self-contained formula — see the note below.
- Add — add Inputs, Outputs, Code snippets and the Ticker training pool to the network.
- Neural Network Name — names the AFL section and the saved
.netfile. - Configuration tabs — Settings, Architecture, Accuracy and Optimizer.
- Navigation tree — your Inputs, Outputs, Global Code and Ticker pool.
- Messages — validation results and status messages appear here.
The screenshots in this guide were captured from the dark "Slate + Teal" theme. Some controls are disabled in the unregistered build (Save, network-to-AFL export); those are noted where they appear.
Generate Indicator — the network-to-AFL export — embeds the trained weights directly in a formula, so it only works when the design can be a plain formula. It greys out (with a tooltip giving the reason) for any sequence model (LSTM, GRU, TCN or Transformer), when Layer Normalization is on, when the network has a categorical input, or when Ensemble Size is above 1. In all of those cases the on-chart Combined and Separate formulas still work — they call the trained network through the toolbox rather than inlining it.
The configuration tabs
Each tab groups a set of related hyperparameters. You can fill them in any order; sensible defaults are pre-filled so a network is valid as soon as you add its inputs and an output.
| Tab | What it controls |
|---|---|
| Settings | Training length and rate, the test split, and the error and learning algorithms. Details. |
| Architecture | The model type (Feed-Forward / LSTM / GRU / TCN / Transformer) and its hidden layers. Details. |
| Accuracy | Regularization that fights overfitting — dropout, early stopping and more. Details. |
| Optimizer | Hyperparameters for the chosen learning algorithm and the learning-rate schedule. Details. |
Hover the small ? glyph next to any field in the Wizard for the same plain-English help that this guide is built from.